Running Manjaro ARM in UTM on M1 Mac
Introduction
After some time of silence on my blog I want to share with you some cool stuff I was figuring out the last weeks and months. Let me give you a short background first though, just to set the context right…
Over the last 2 years I was heavily involved in a novel product from my employer. Working from the specs to a PoC and then having the first users on the system was really challenging and time consuming, but on the other hand a lot of fun… and I’ve learned a lot also in regards to developing, distributing and running complex software on embedded devices.
As part of this I recently rewrote part of the on-device software in Rust. As more complex Rust projects tend to consume a lot of compile time (even for debug builds), and I was on the turn to get a new laptop from my company anyway, I voted for a 14“ M1Pro MacBook Pro. Compile times in Rust have reduced dramatically on that machine and it is really fun to have this huge power available in such a mobile form factor…
Nevertheless I also was eager to check out if and how I may be able to run my beloved Manjaro ARM Sway system on the device with the help of a virtual machine manager such as UTM.
This is how it all turned out…
Requirements
This guide assumes that you are using an Apple Silicon based Mac - so either M1, M1 Pro, M1 Max or M2, which is having the same CPU architecture as the Manjaro ARM images (aarch64). Even though the UTM software is utilizing Qemu behind the scenes and it might be possible to emulate the aarch64 processor on an x86_64 PC as well, I haven’t tested this setup (yet) and would expect a much slower experience of the virtual machine.
Beside the hardware you should have a decent macOS operating system installed, and have downloaded and installed the UTM virtualizer.
Hint: if you want to support the developers of the UTM application you should buy the version from the Mac App Store ($9.95 at the moment).
Also having the QEMU tools installed on the system helps with management and support of the created VMs from the commandline / scripts. You can easily install QEMU via HomeBrew or MacPorts.
Installation Guideline
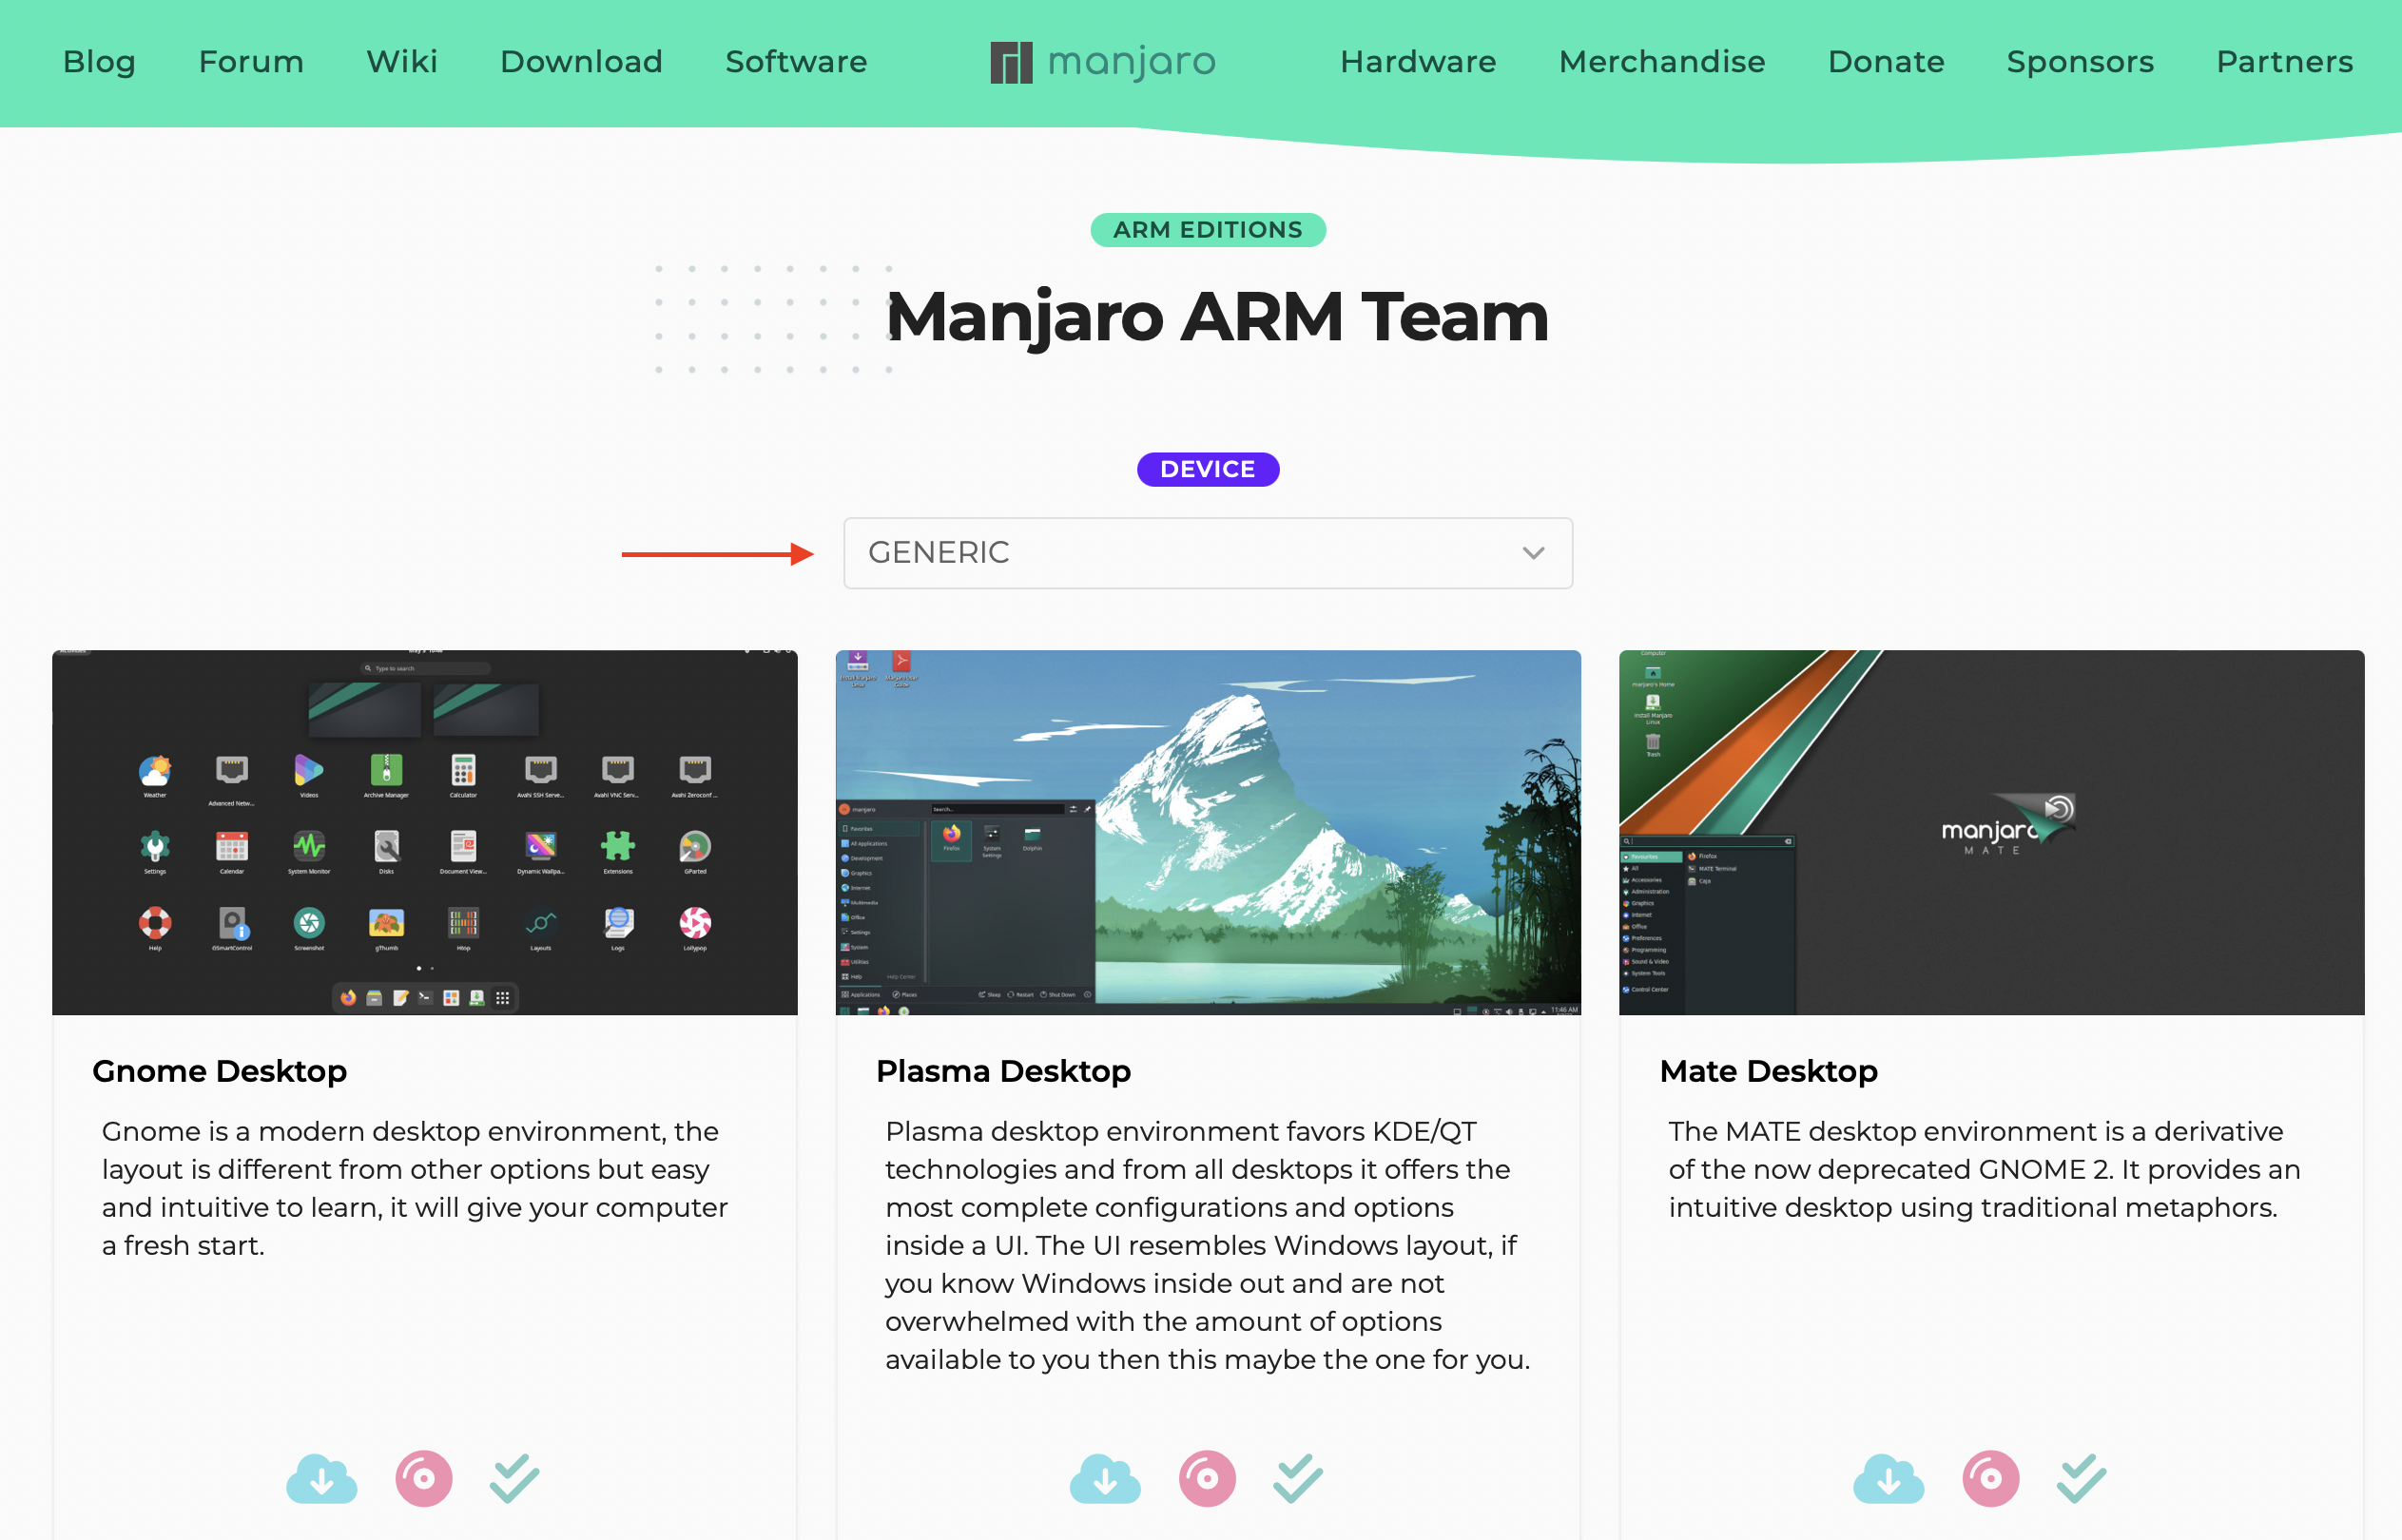
- First you have to grab an image for Manjaro ARM from the Manjaro Download page. Make sure to select the GENERIC device option:
- After the download finished you should extract the
...img.xzarchive to get access to the raw disk image of the system. When double-clicking on the disk image file in the Mac Finder it will be mounted and you can see the initial boot partition with the nameBOOT_MNJROon the desktop. This boot partition does contain the Linux Kernel Image, Init RAM disk as well as boot parameters in theextlinuxdirectory:
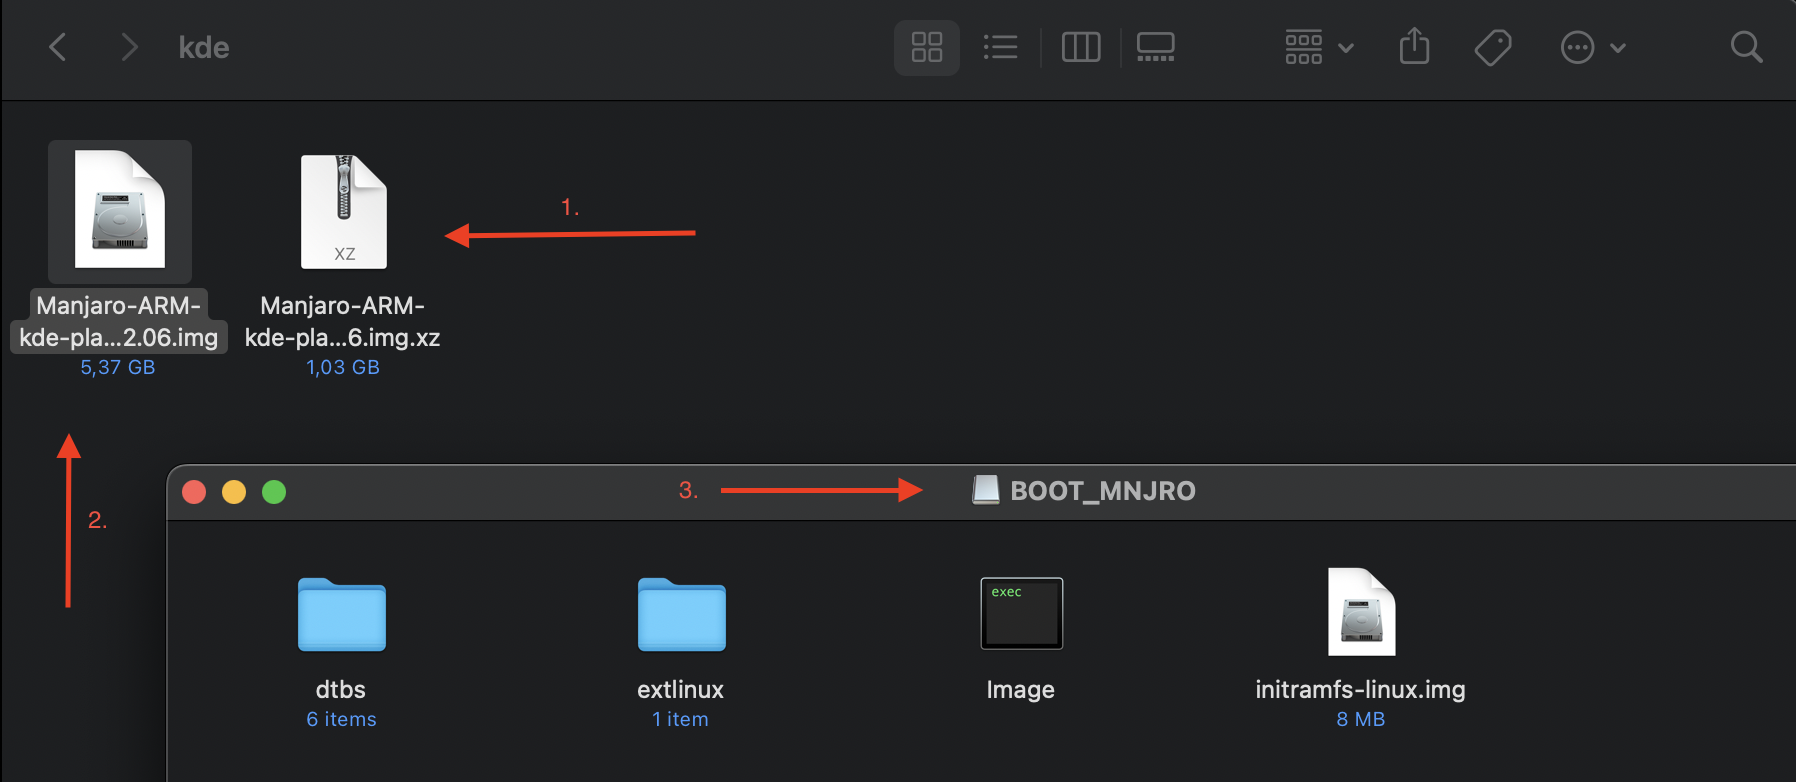
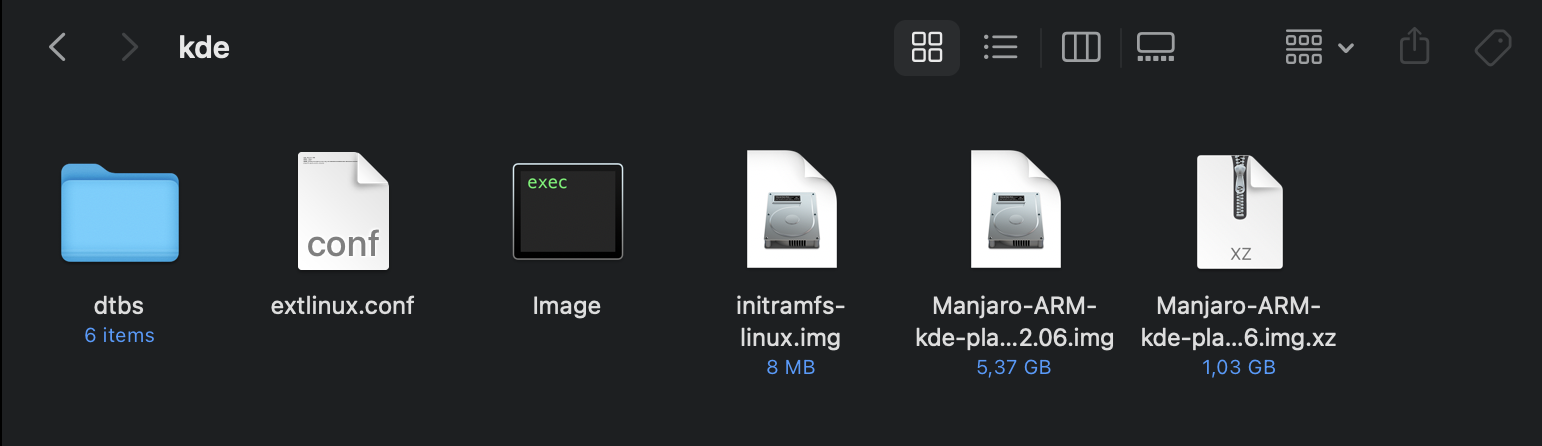
- Copy over the files from the boot partition to the local folder on your Mac incl. the content of the
extlinuxdirectory like so:
Afterwards you can eject / unmount the boot partition from your Mac via the Finder.
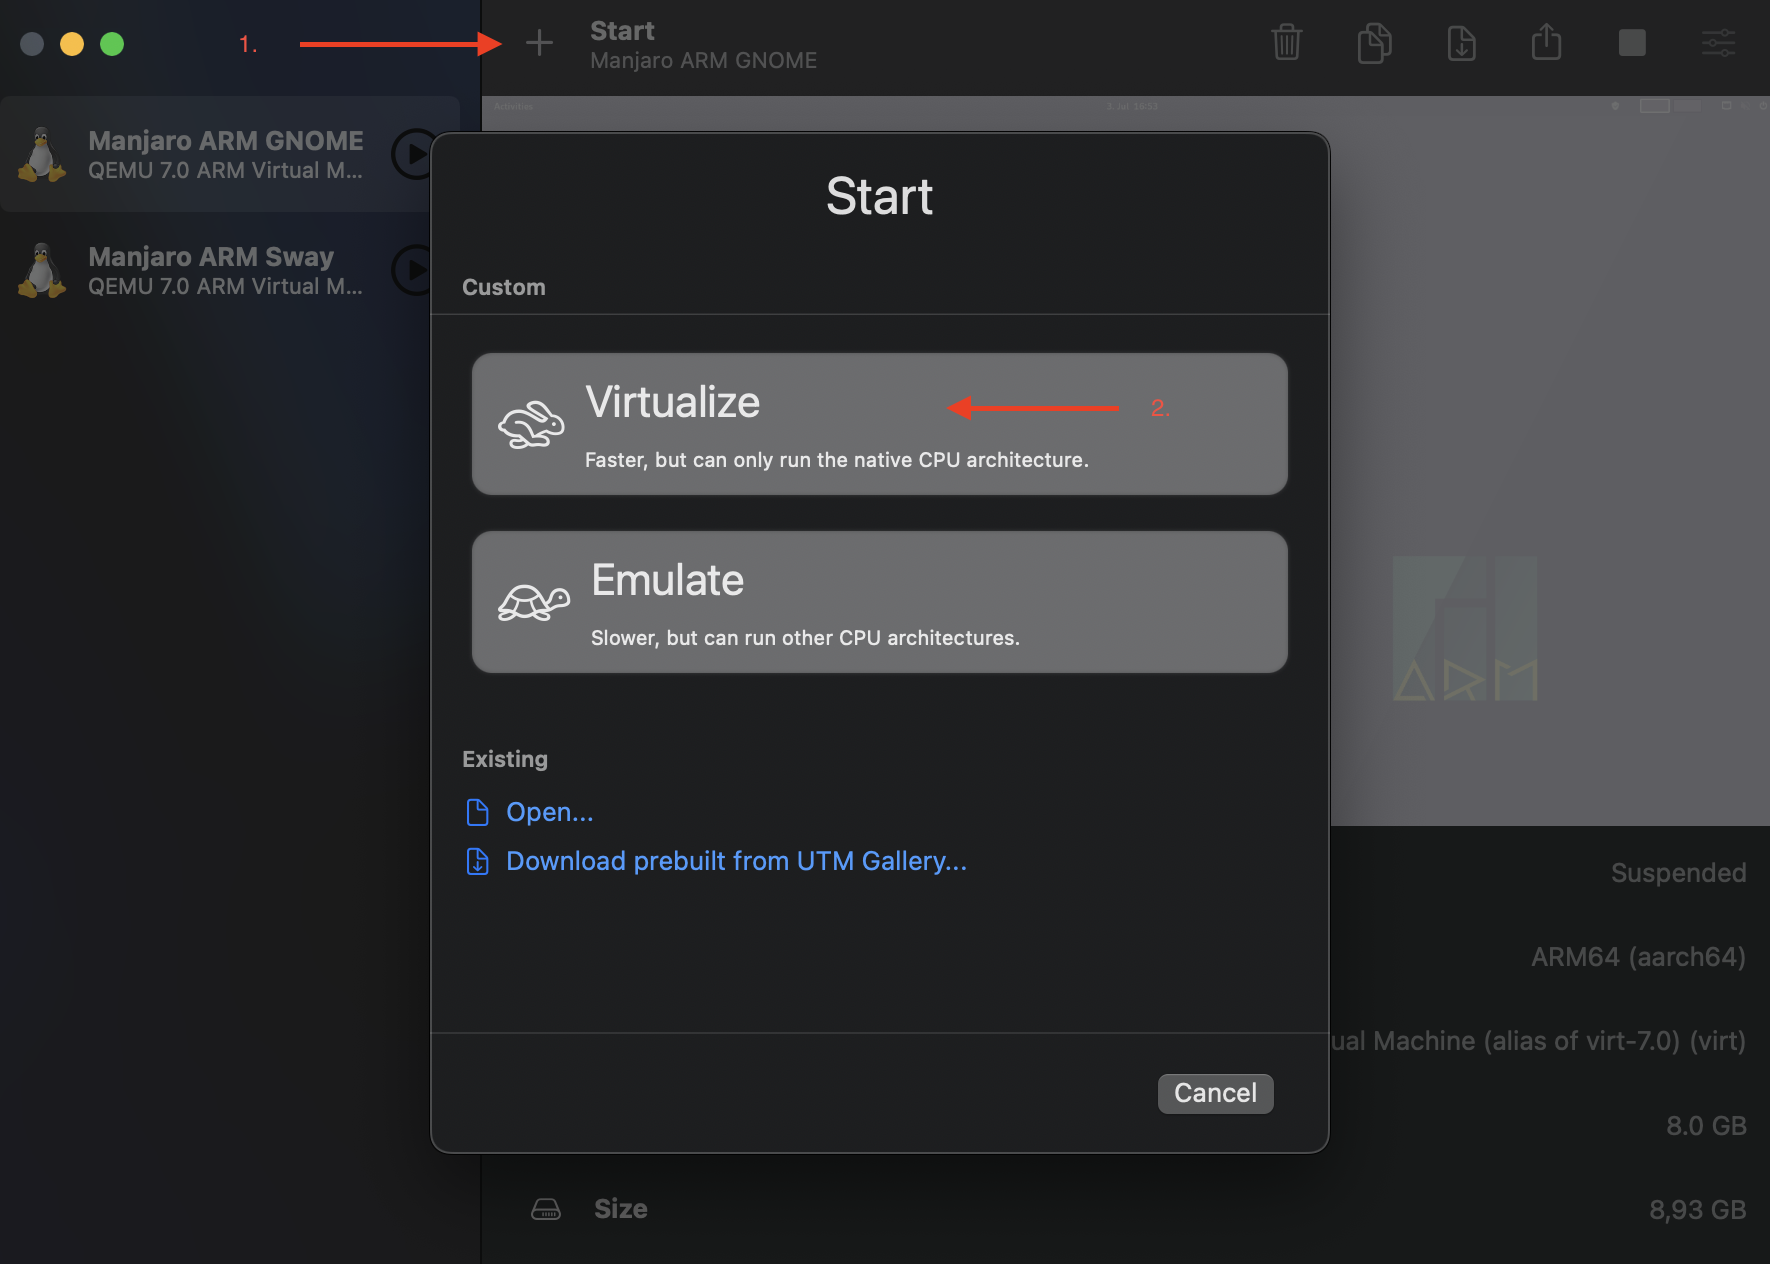
- Next open up the UTM application on your Mac and start the New Virtual Machine Wizard. Make sure to use the Virtualize option in the first step:
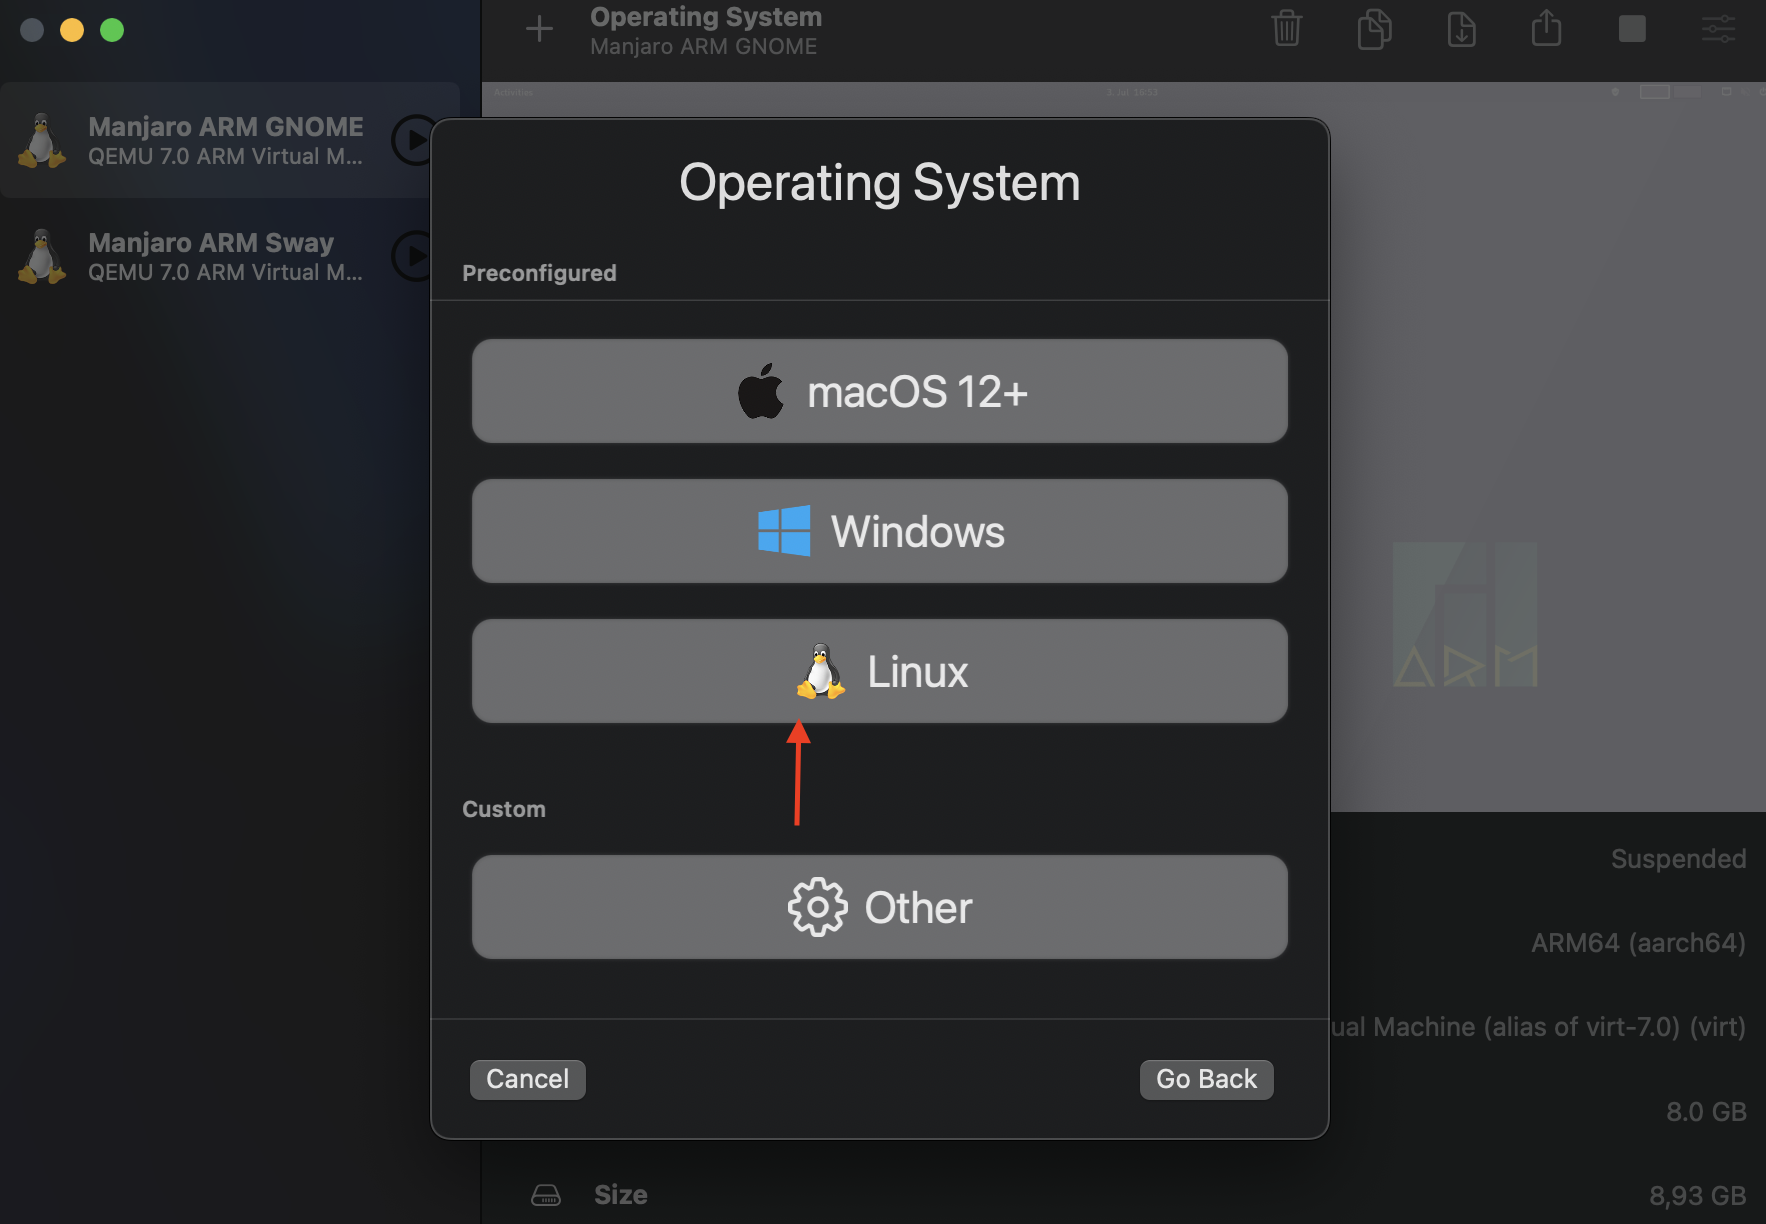
- On the next screen select the Linux option:
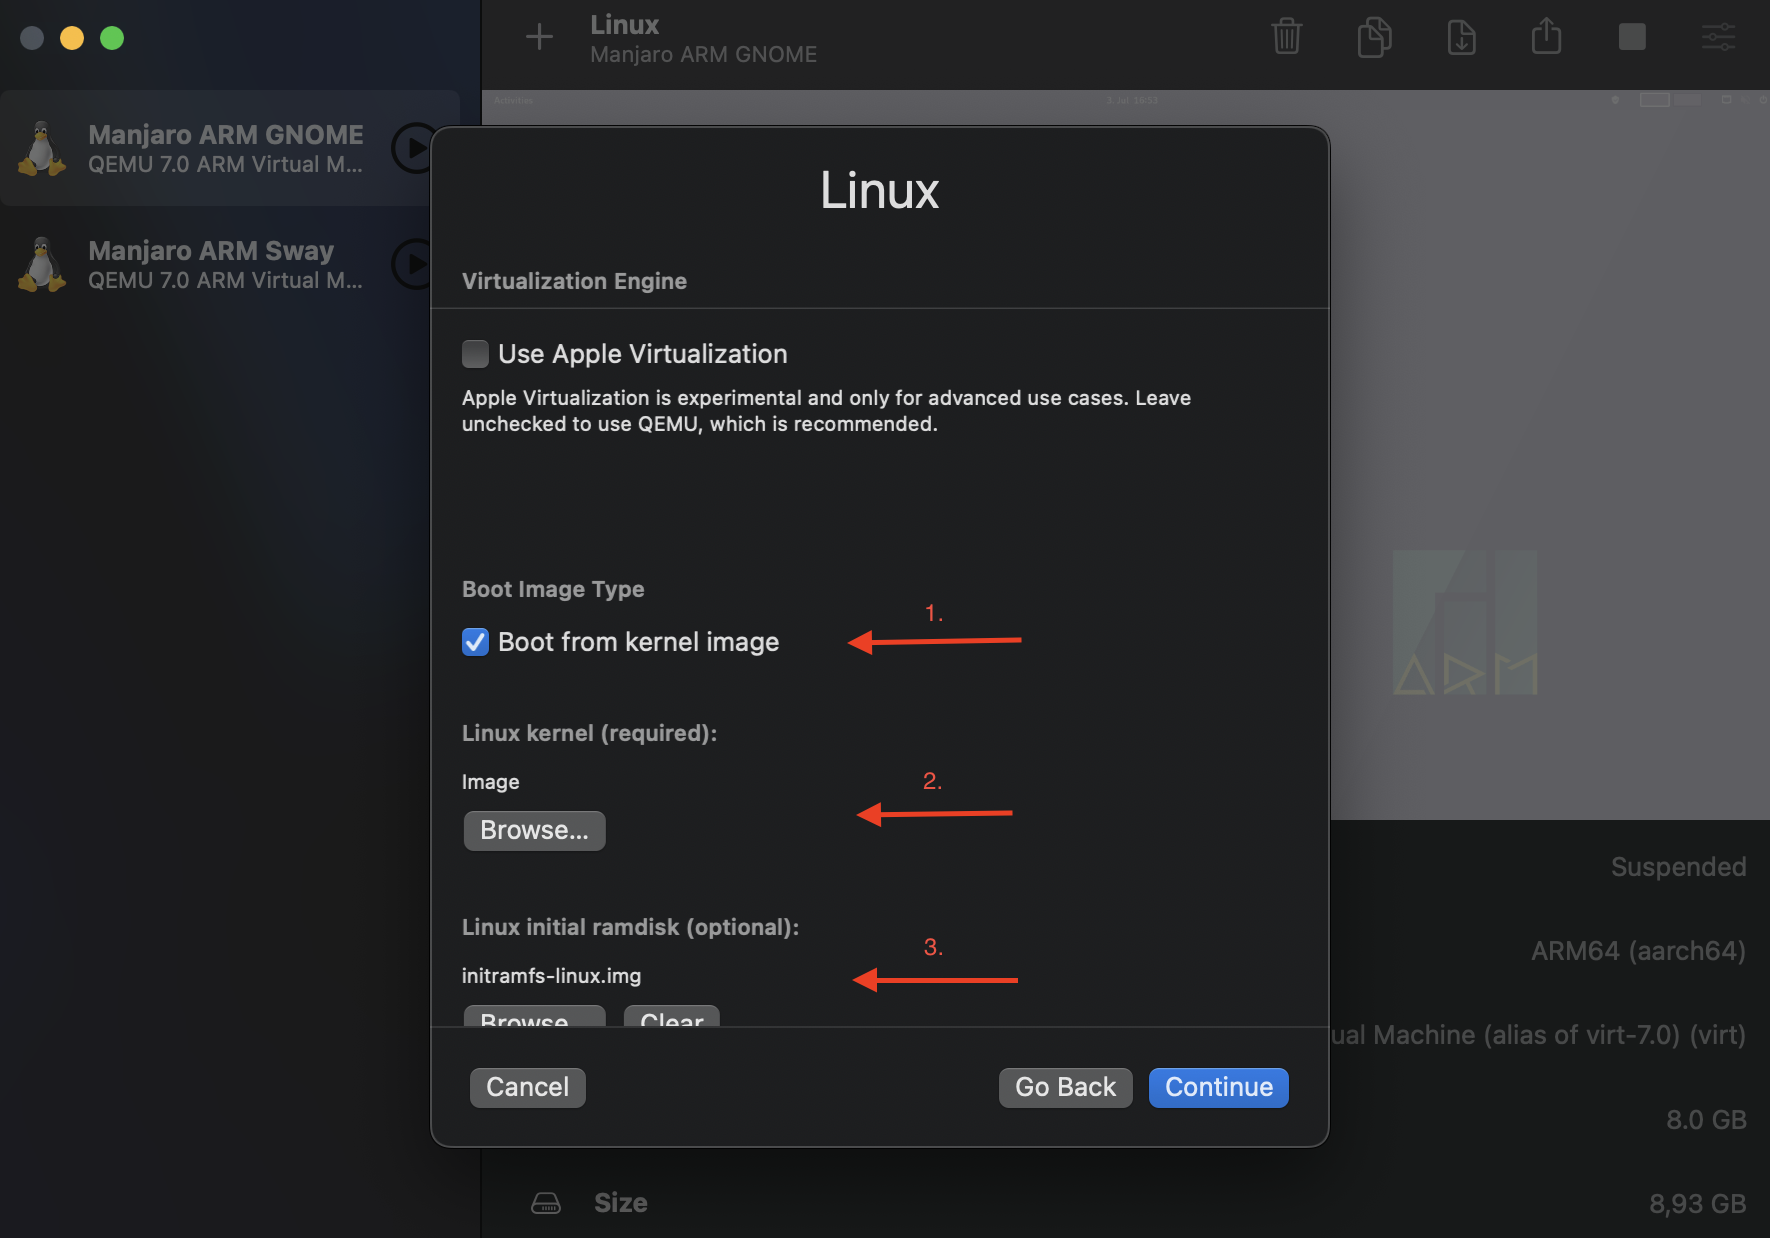
- When you get asked for the Linux virtualization settings, please choose Boot from kernel image and in the next sections select the Linux kernel image, Linux initial RAM disk from the prepared folder (from step 3)…
- Scroll down on the same page and choose the Linux Root FS Image - use the downloaded raw disk image for that option (see step 2). Then open up the
extlinux.conffile in your local folder and copy the following content from it (esp. the root partition uuid)…

… and add this to the Boot Arguments section at the very end - note: you have to surround it with ":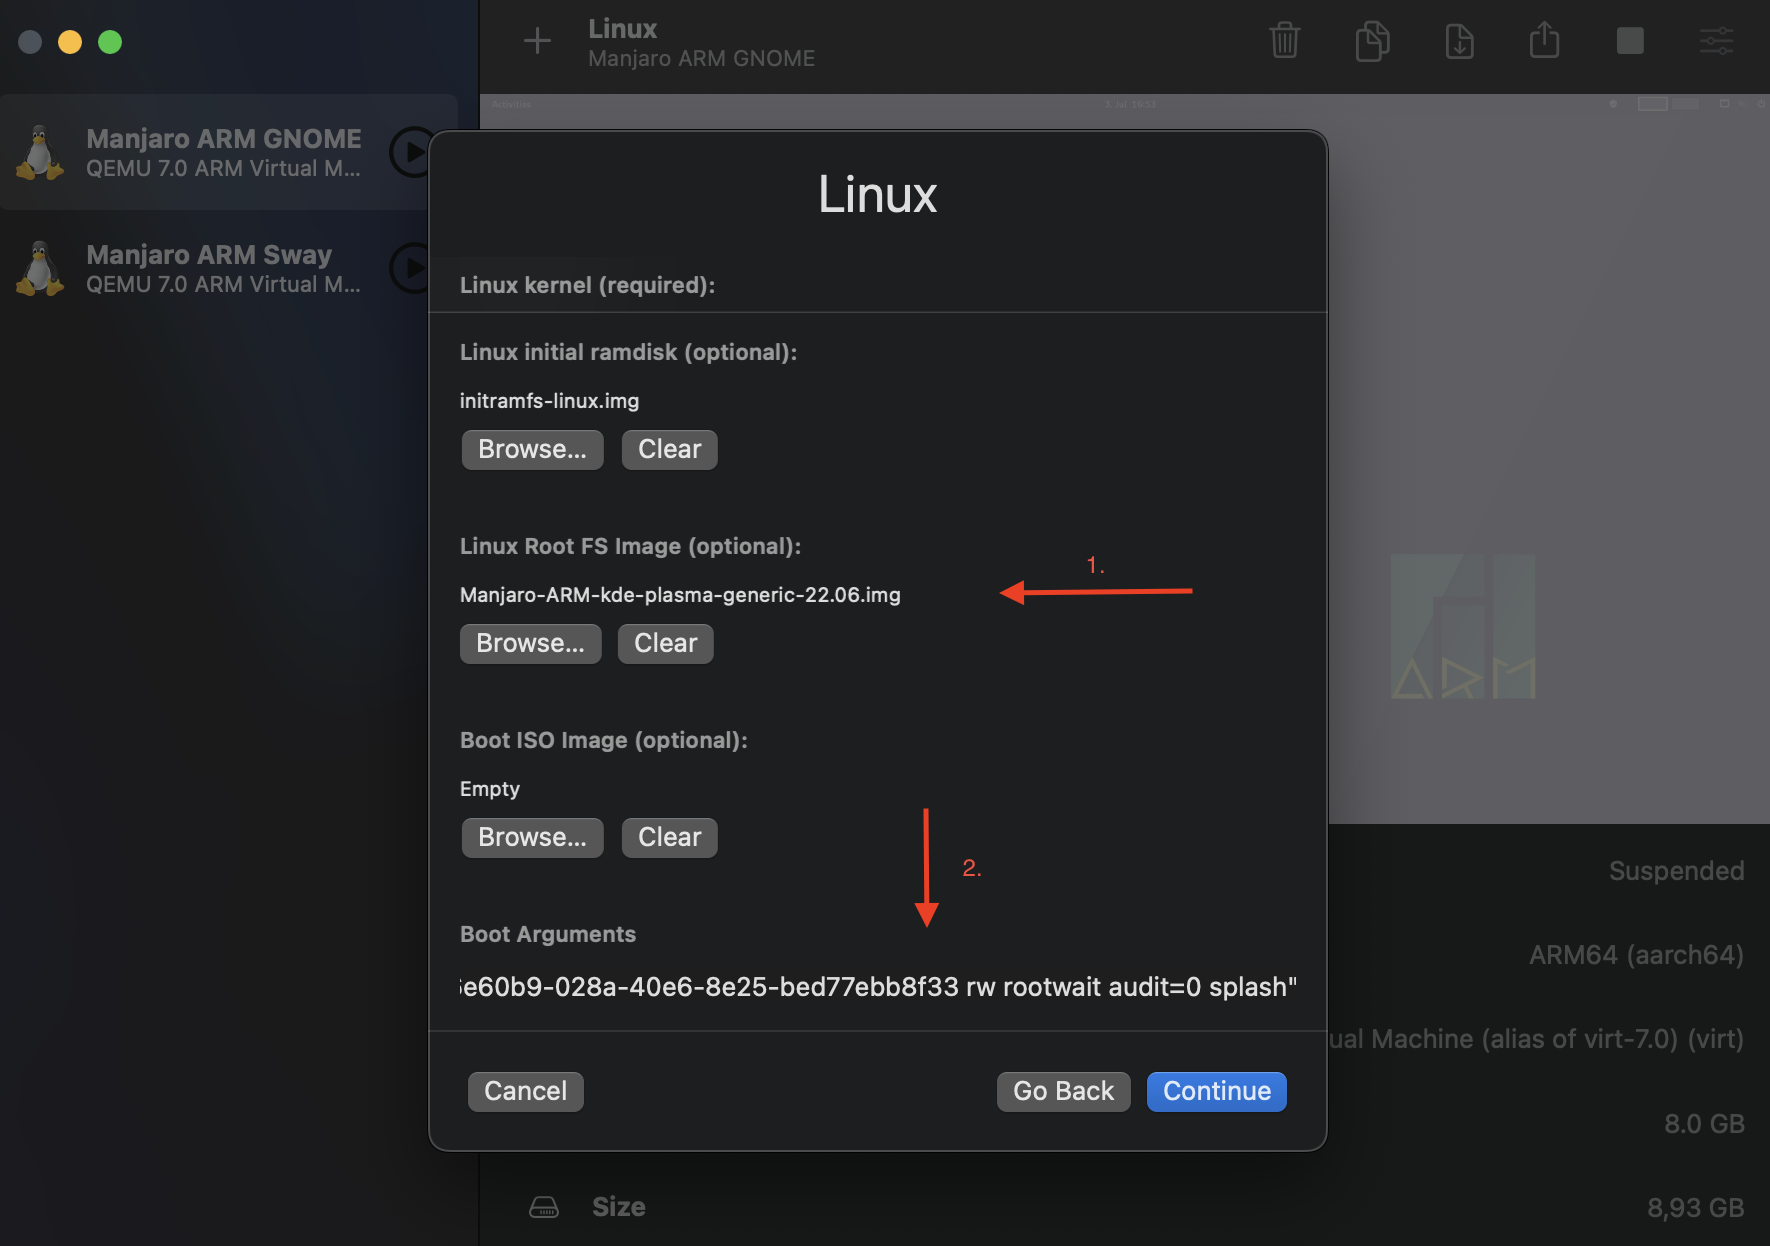
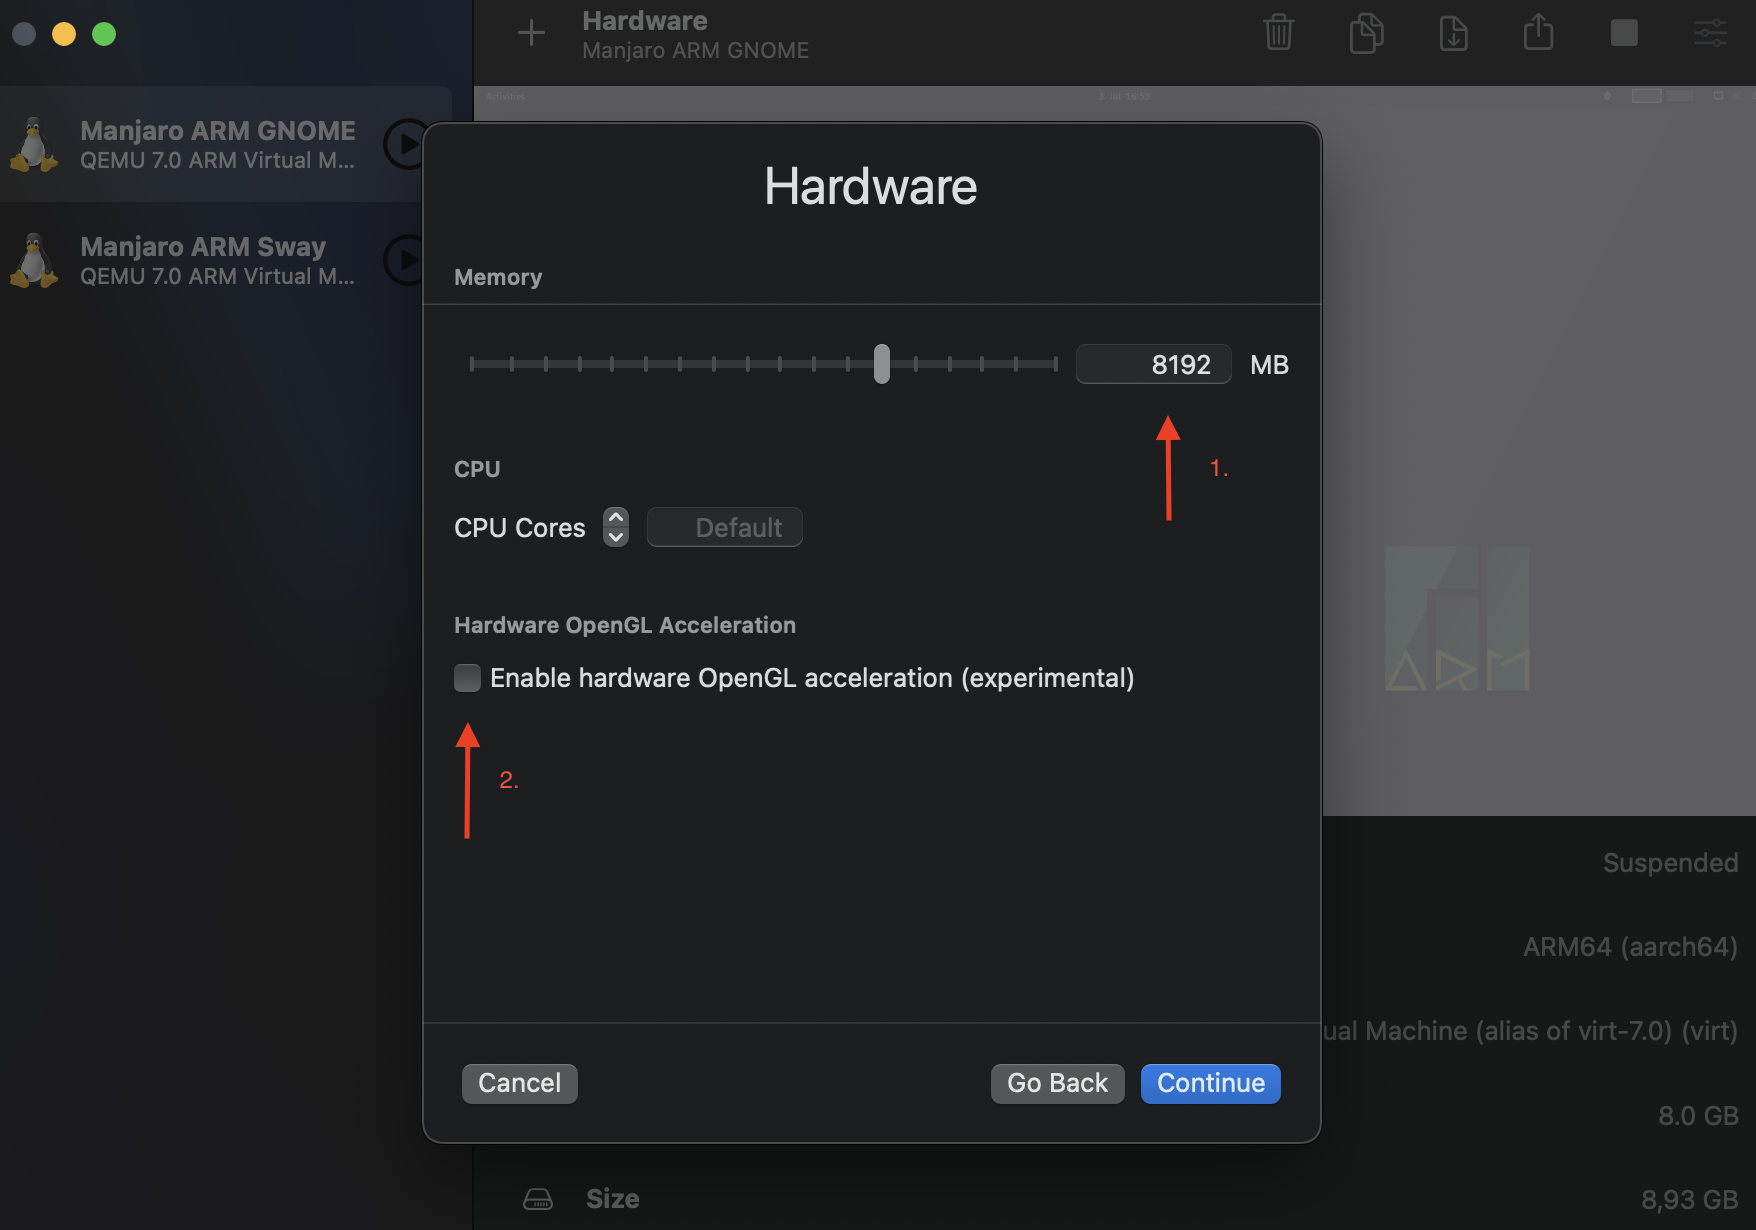
- Go to the next section and select the amount of RAM that you want to spend for the virtual machine. Also make sure that the Hardware OpenGL acceleration IS NOT selected. This part of the virtualization still seems to be buggy, but you won’t notice any performance impact for standard desktop usage…
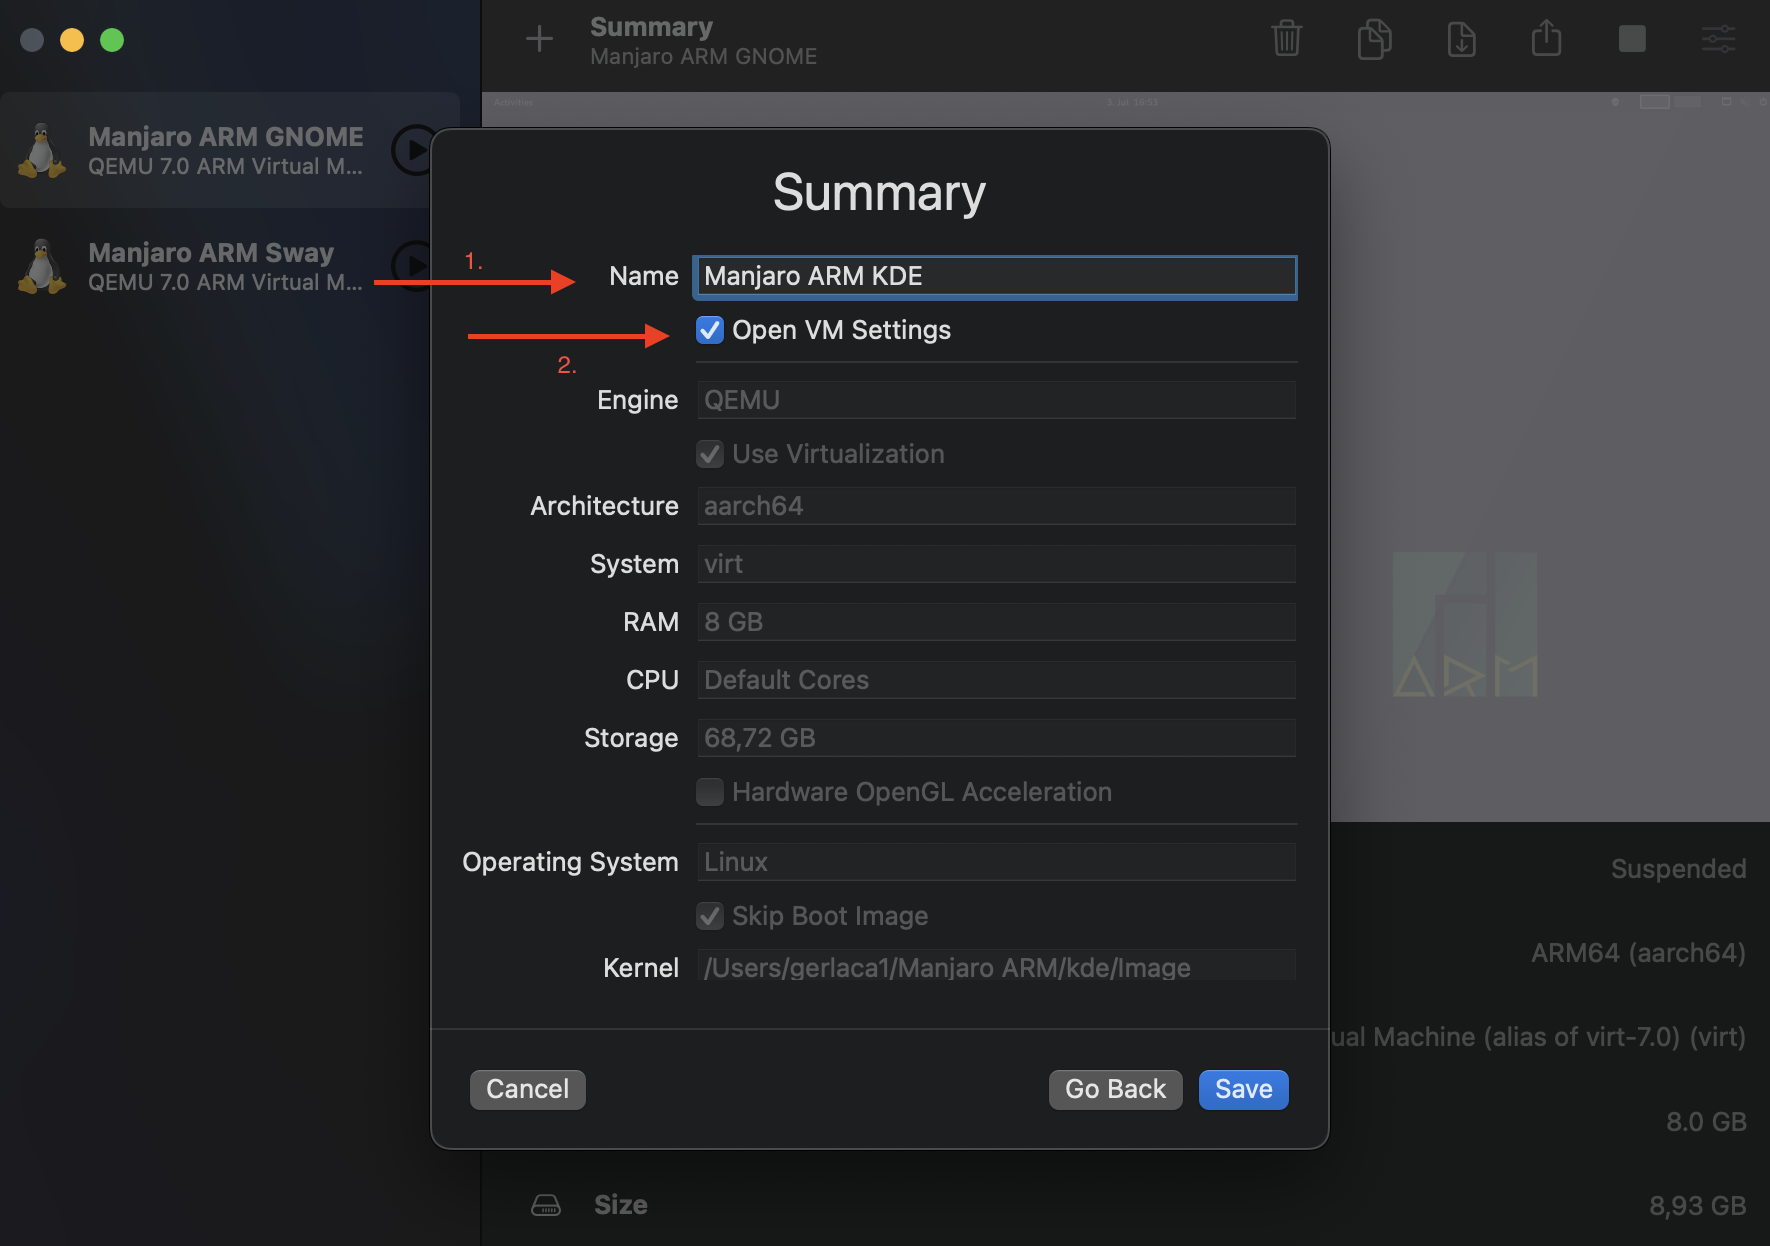
- On the last page of the wizard make sure you give the VM a meaningful Name and check the box saying Open VM Settings:
- In the VM Settings first make sure that the additional boot parameters have been added properly. Navigate to the QEMU section and scroll to the very end of the long list of command line parameters…

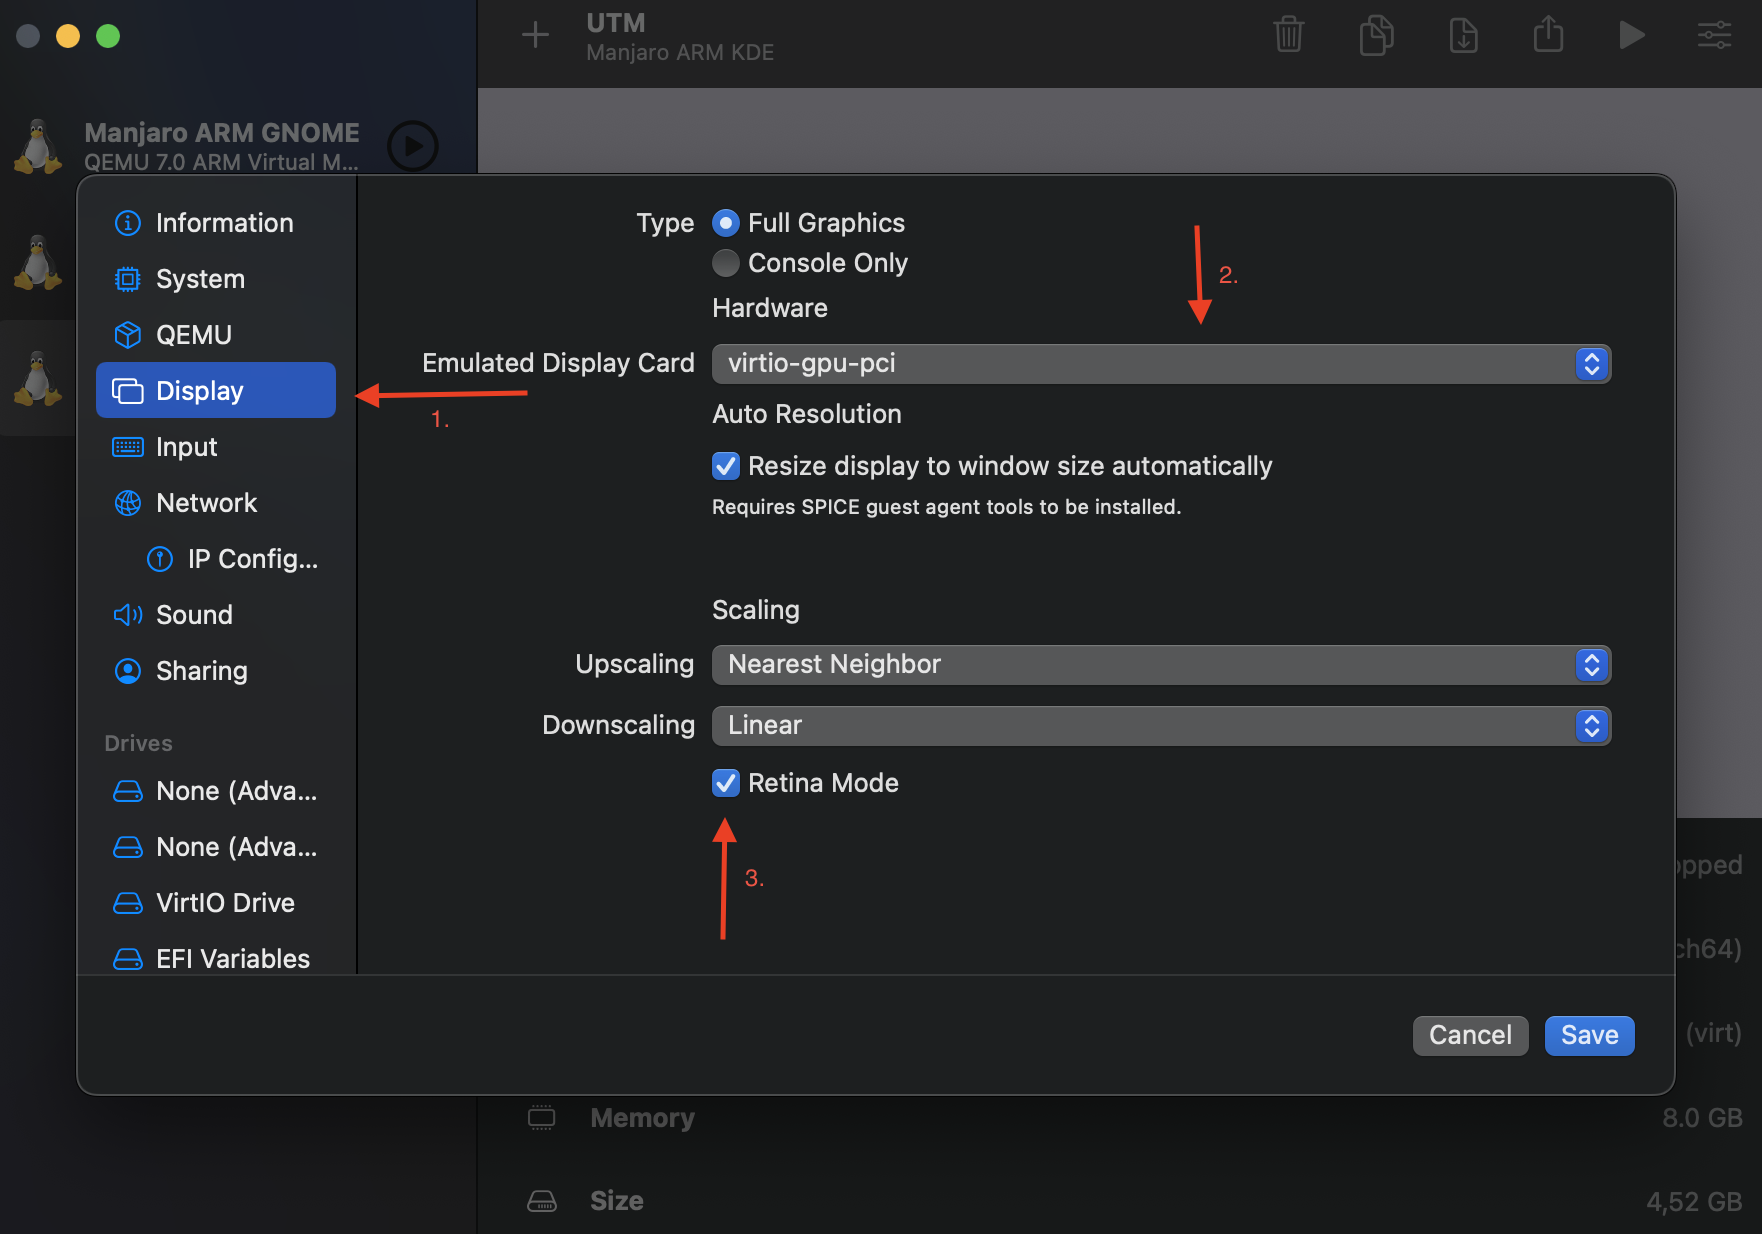
- Go to the Display section and check that the selected Emulated Display Card is set to
virtio-gpu-pci. Also you should check the option Retina Mode if you plan to run the VM on an high-resolution display:
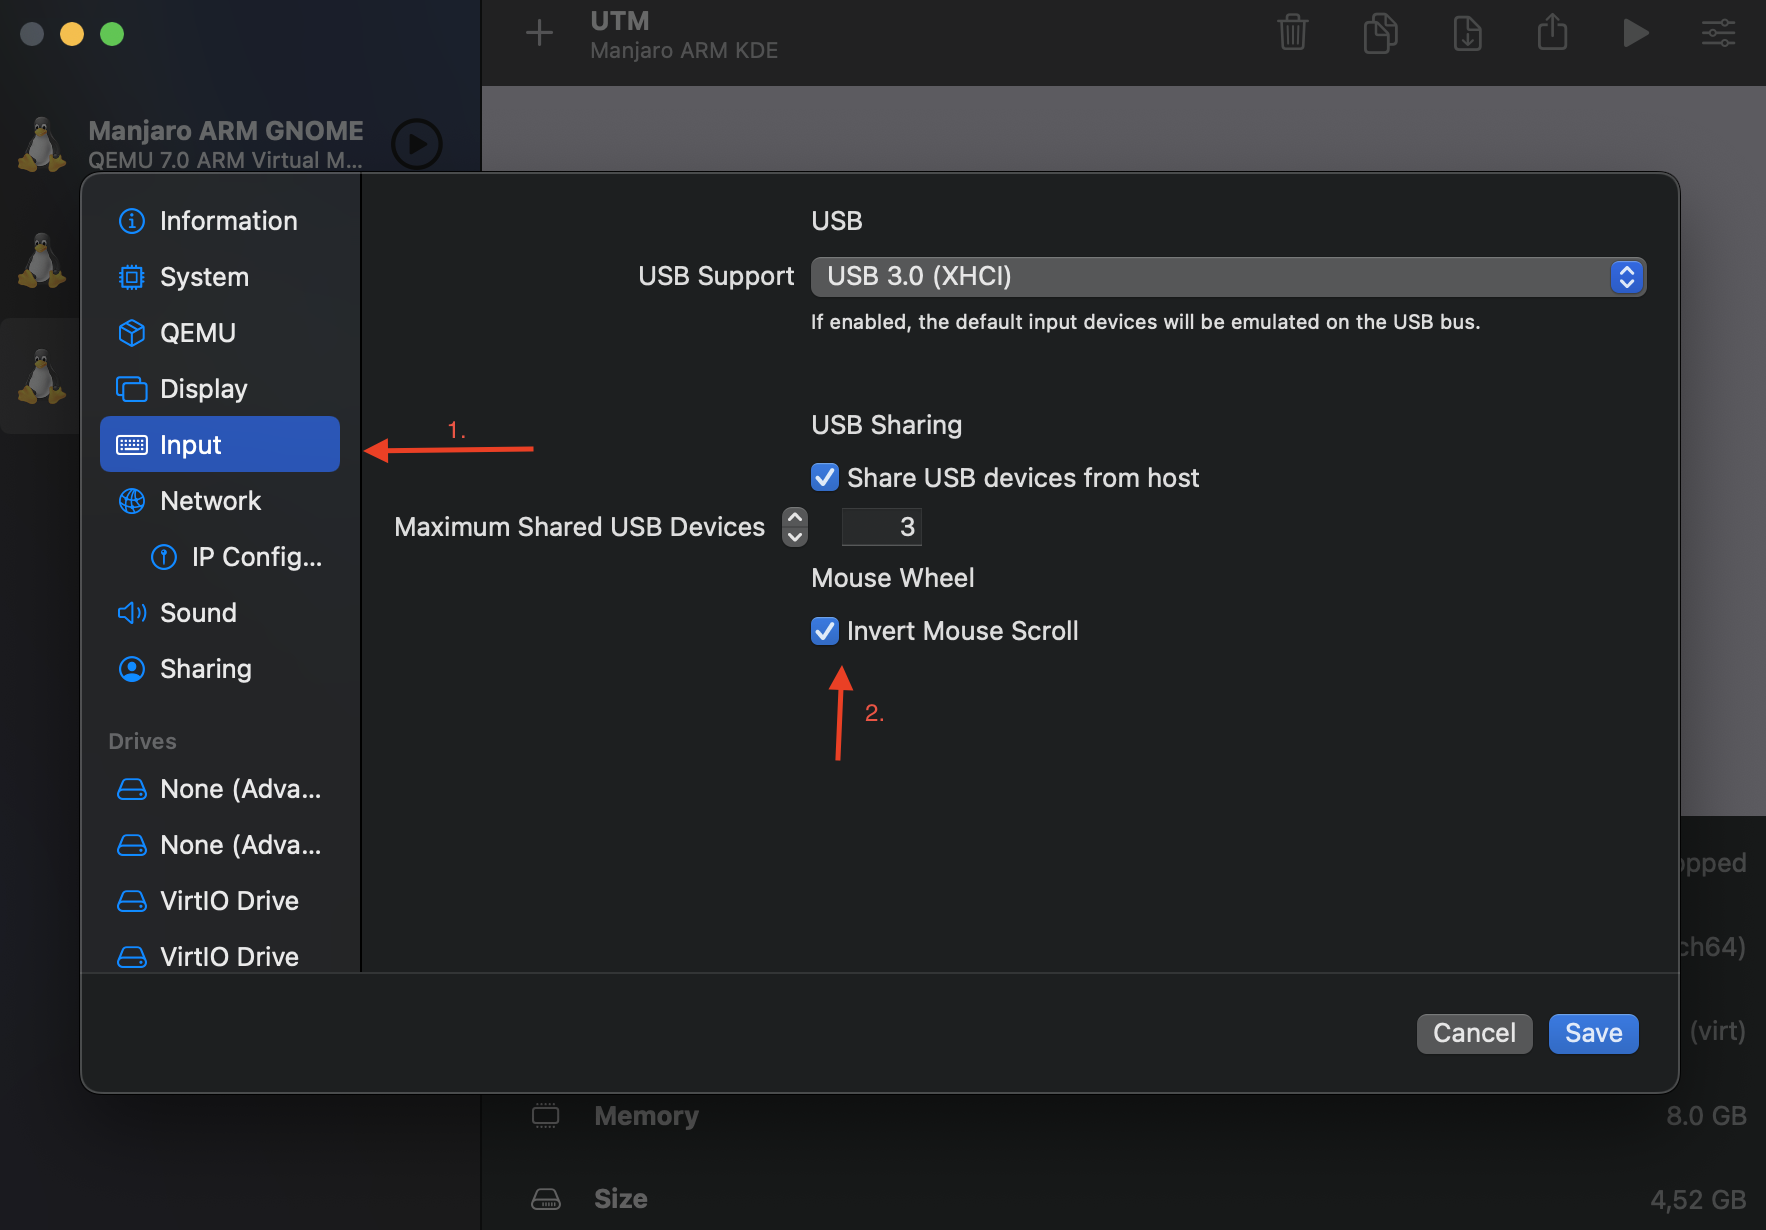
- Optional: In the Input section of the settings you can turn on the Invert Mouse Scroll option to have the Natural Scrolling in the Linux VM as well:
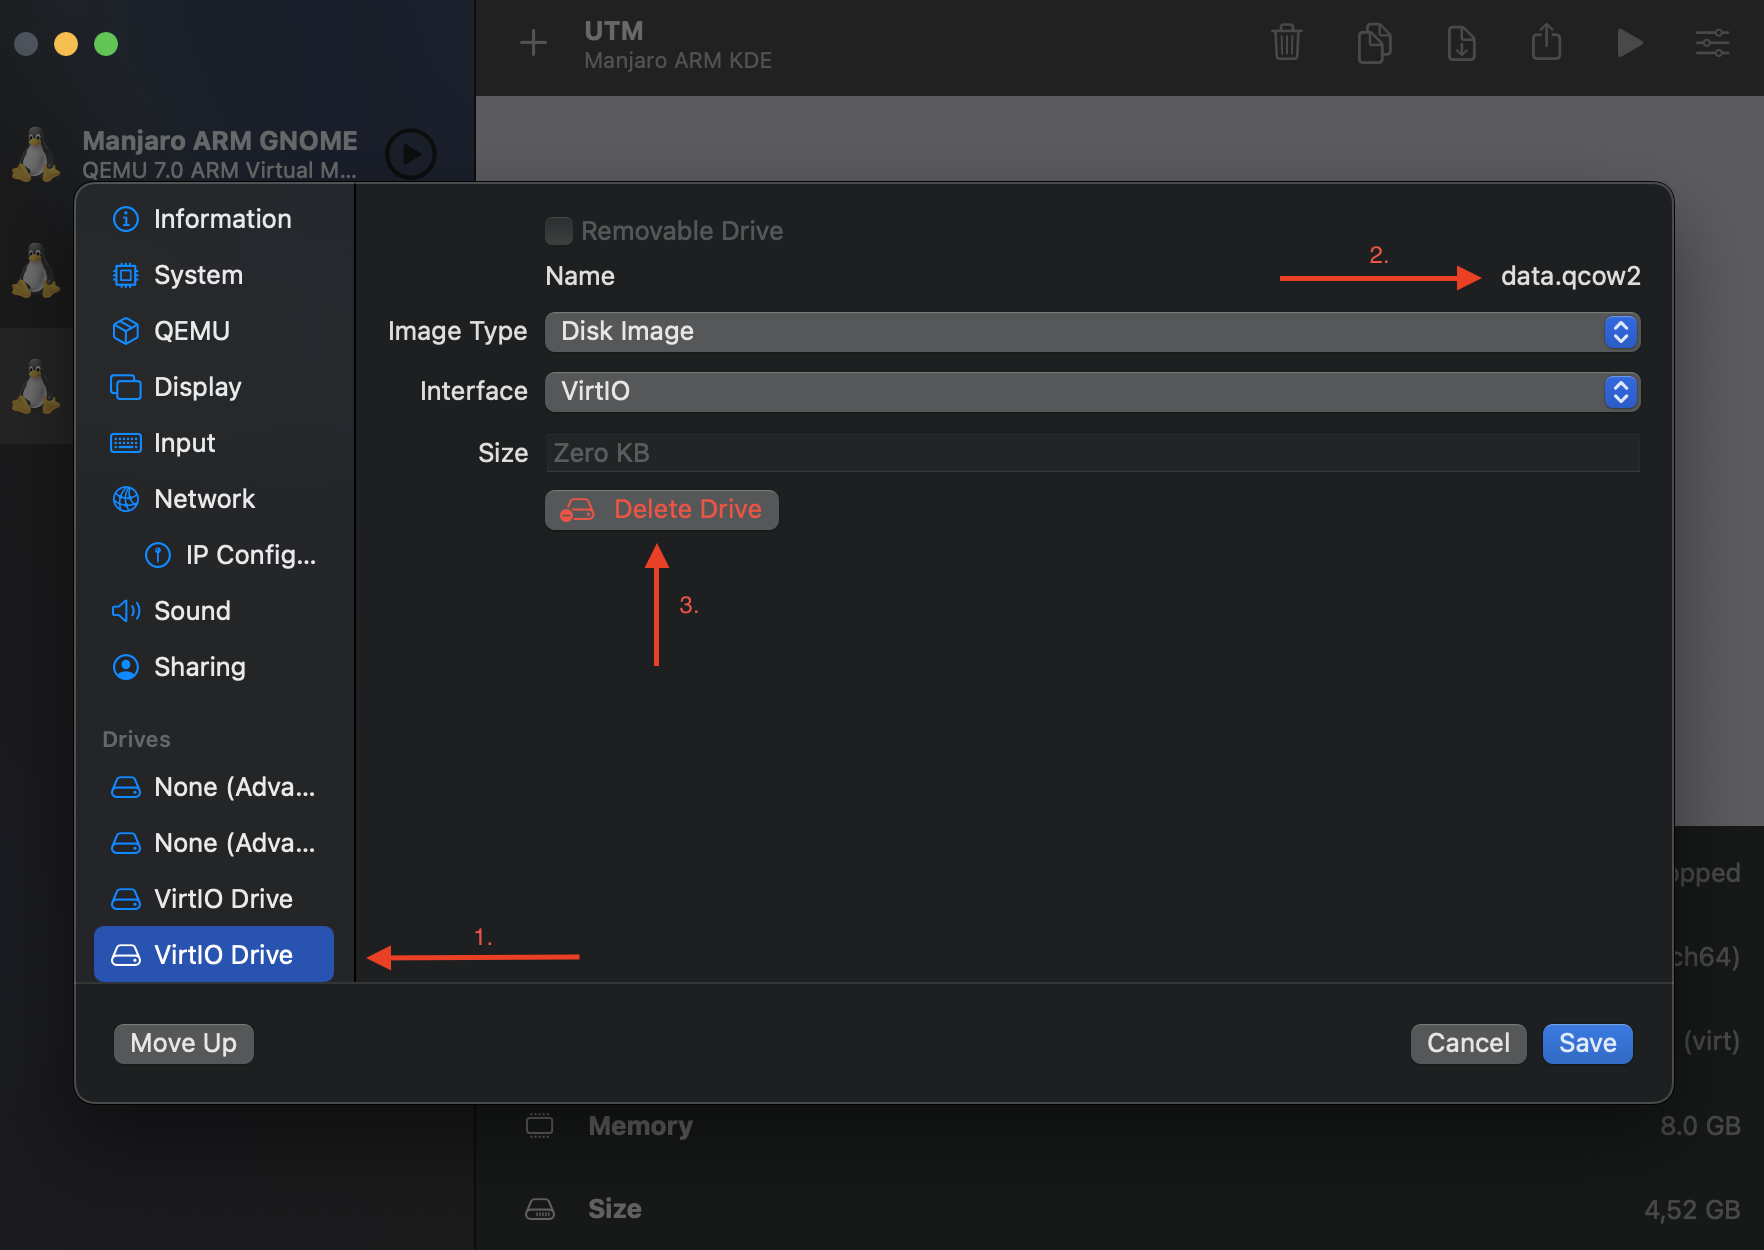
- As a final step check out the VirtIO Drive entries listed in the lower left section and find the one that has the Name
data.qcow2. This one has to be removed as there seems to be a bug in the VM creation, which leads to referring to a non-existing disk image…
- You can finally close the VM settings. Before booting the VM we still need to increase the storage of the Linux Root FS image. We have set this to the disk image we downloaded from the Manjaro homepage in step 7. But the image we have received from the Internet is optimized for distribution and as such doesn’t have much free space to offer. To extend the disk image you need to open up a Terminal window on your Mac and follow these easy steps:
- from your home directory head over to the folder of the UTM virtual machine images:
cd Library/Containers/com.utmapp.UTM/Data/Documents/<Name of your VM>.utm - run the following command:
qemu-img resize Images/<Name of your Root FS image>.qcow2 +32G, which would increase the size of the image by 32G (note: not the file itself is increased by that much, but the meta information of the disk size. The file usually grows with the usage of the system up to that size.)
- You can now turn on the newly created virtual machine from the UTM main window. After a short amount of time you should see the Manjaro boot splash logo. Initially you have to run through the
Manjaro ARM Linux setup programin your VM as well…
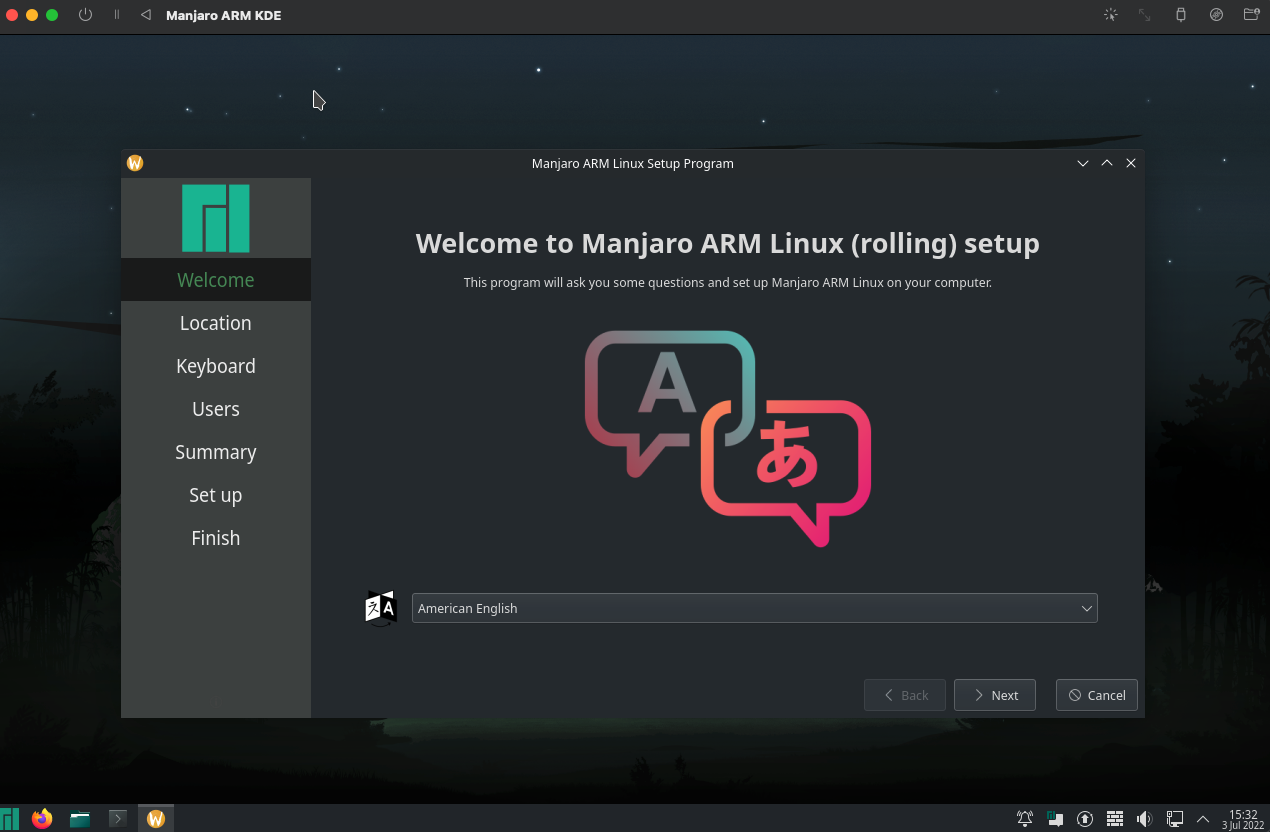
…configuring your new Manjaro ARM Linux system by providing information such as timezone, language and keyboard settings as well as the user account to be created at the end of the process. After finalizing the initial setup you have to reboot the system: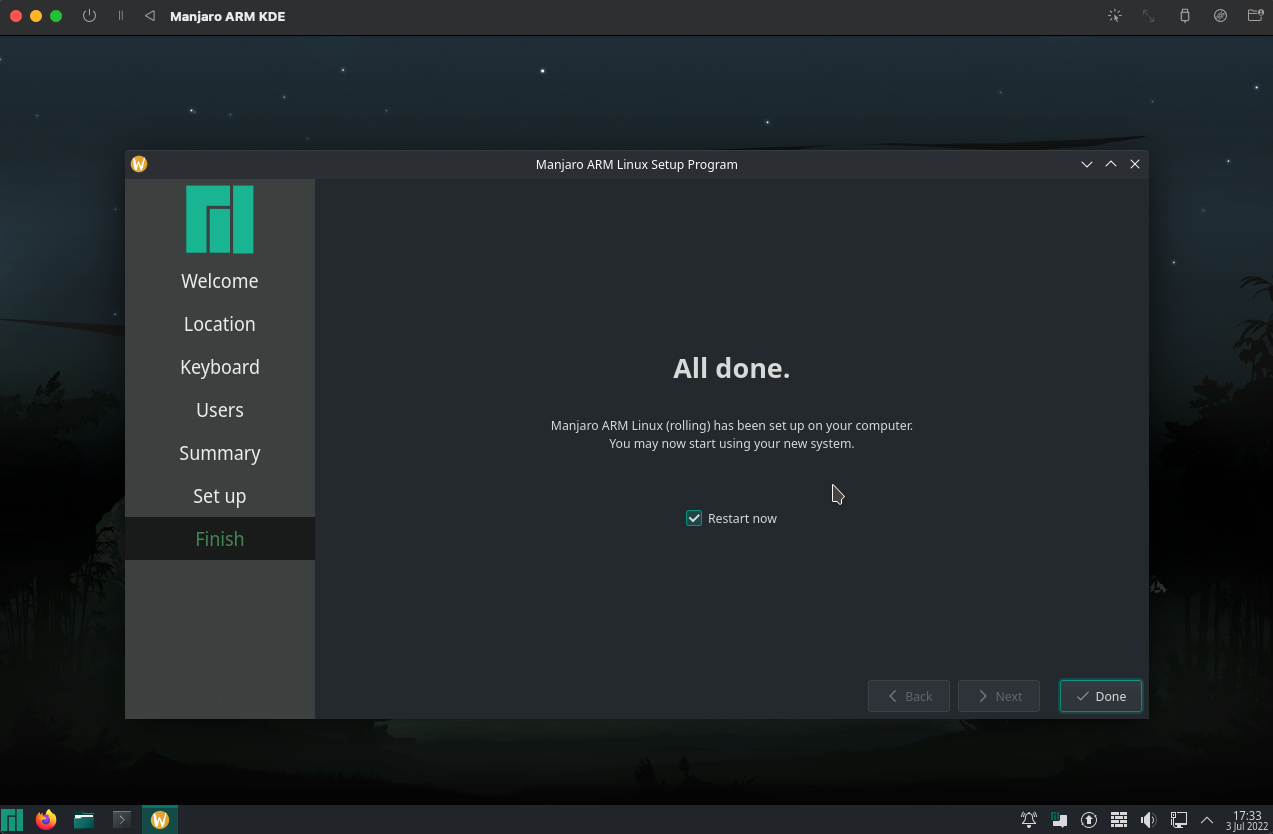
- Reboot might take some time, so please stay patient. After the reboot succeeded you can login with your entered user credentials to the desktop. First thing you should do there is to limit updates of the current Linux kernel as well as install a missing package…
So start the Add / Remove Software program from the start menu…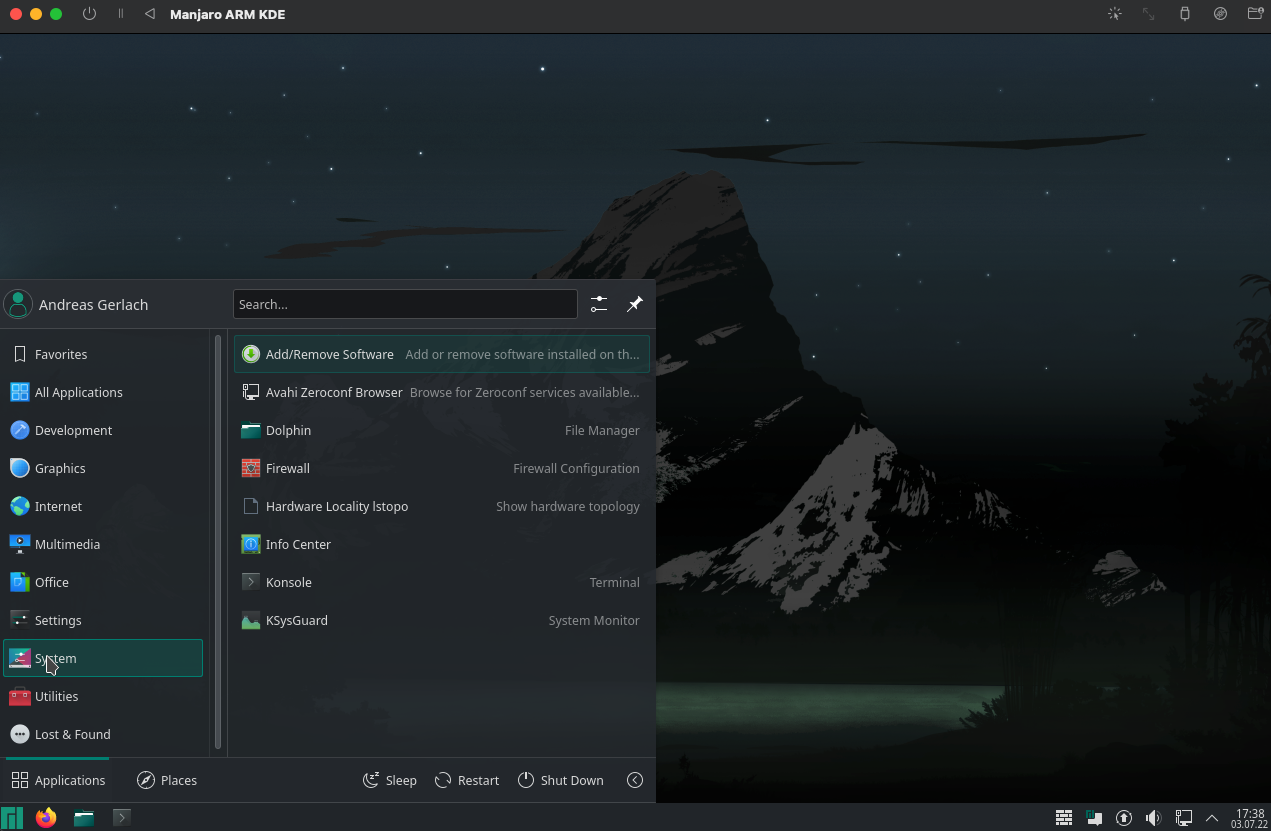
…in there open the Preferences from the context menu…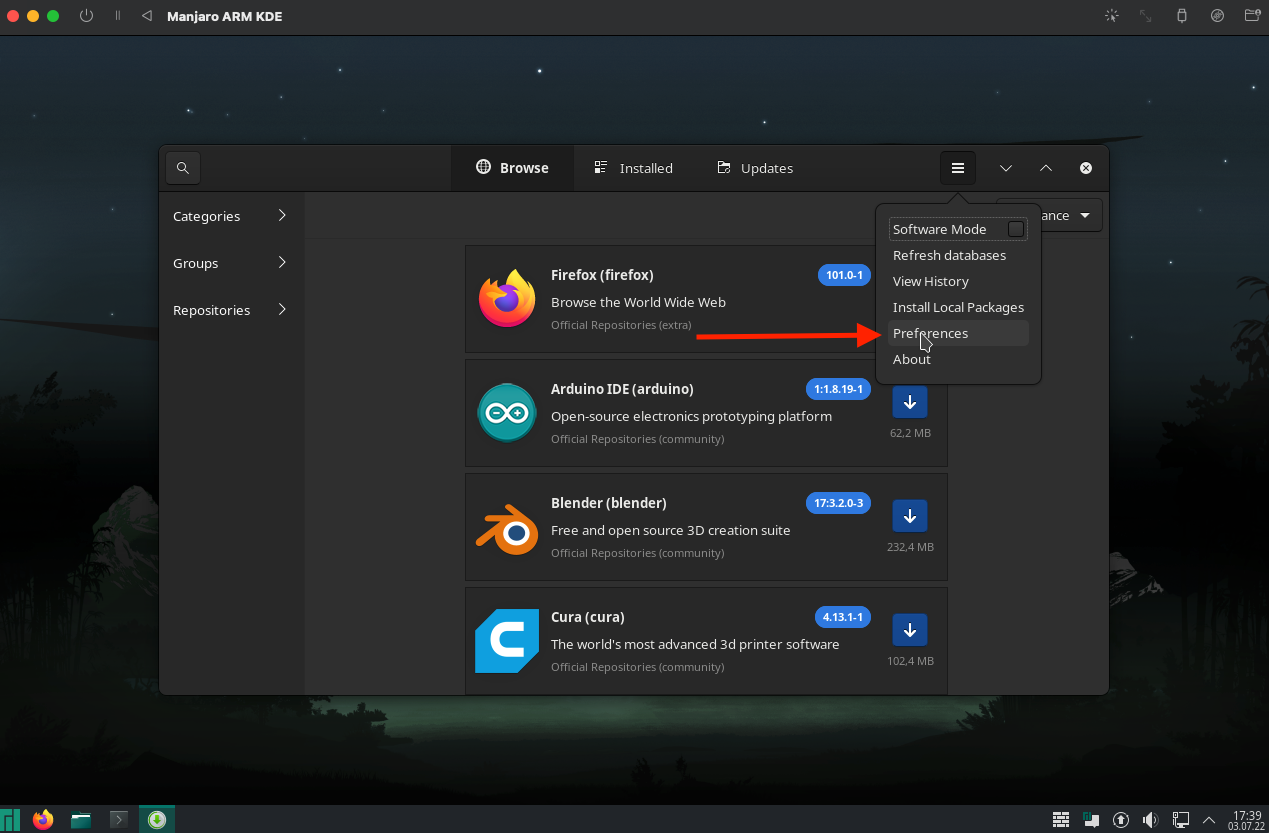
… go to the Advanced section and add the following items to the Ignored upgrades list: linux and optionally linux-headers…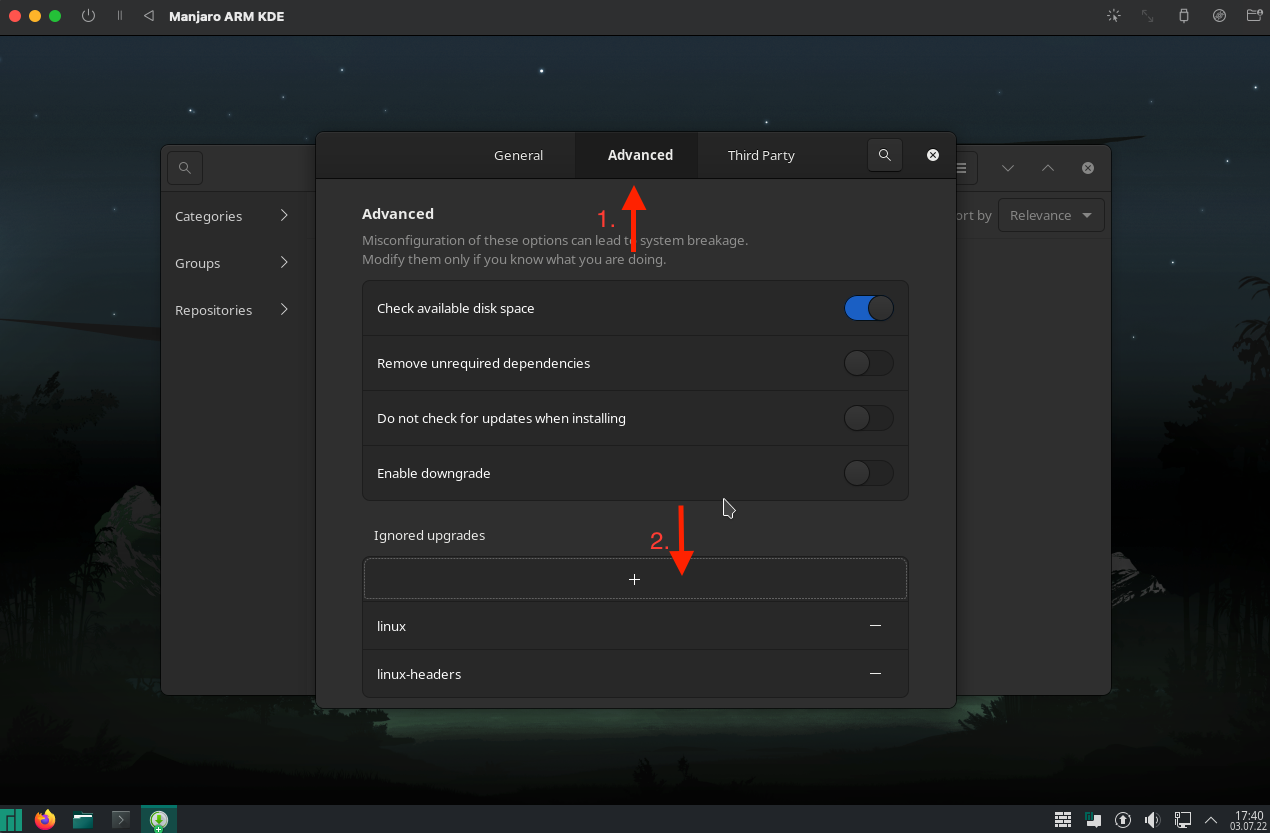
…next search for the spice-vdagent application and install it: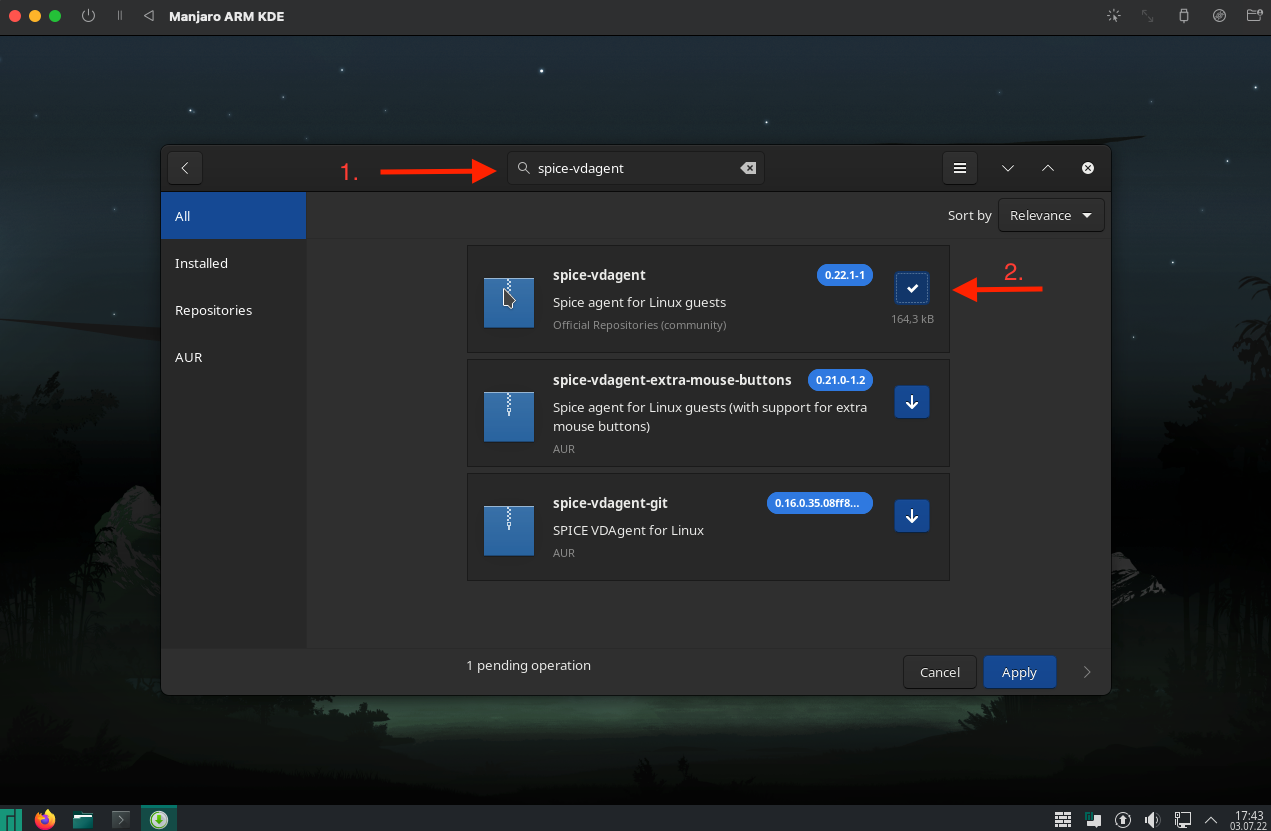
- Reboot the system once more. After this reboot the size of the desktop should be adapted to the size of the UTM window automatically (via the
spice-vdagent). So try toggle to fullscreen and you should see the Linux desktop size increasing as well…

Notes
As you may have noticed we have disabled upgrades to the Linux kernel in step 16. This is due to the fact that a Linux kernel upgrade will also result in an updated initial RAM disk. Both of these files we have initially taken from the BOOT_MNJRO of the downloaded disk image. An update to the Linux kernel in the VM would make those invalid and will likely stop the VM from booting up properly. Therefore ignoring Linux kernel upgrades in the VM sound to be a more stable option for now.
I tried out these setup steps with the KDE and GNOME images from the Manjaro Download page successfully. For the Sway image there were still additional hurdles to overcome…
- the SwayWM, which is using the wlroots project, usually requires hardware accelerated graphics on the target system. This is not possible on UTM right now, so we have to configure some fallback options for Sway in the VM:
- boot up the VM, switch to a text console, open the file
/etc/environmentin your editor and add the following lines to the end# disable hw cursors WLR_NO_HARDWARE_CURSORS=1 # force pixman renderer WLR_RENDERER=pixman
- as the default Sway configuration sets up the CMD key to be the main modifier key, most of the keyboard shortcuts are interferring with the ones from macOS itself. You can either force the input to the VM, or you can change the modifier key(s) in your Sway configuration like so:
open the file
$HOME/.config/sway/configin your editor and add the following two lines after theinclude $theme/definitionsinstruction:# import theme specific definitions include $theme/definitions set $mod Mod1 # sets up ALT as main modifier key set $alt Ctrl # sets up CTRL as the second modifier key # Your preferred terminal emulator
- don’t forget to install the
spice-vdagentpackage (see step 16). Reboot the system after the updated configuration and you should be able to run through the initial Manjaro setup procedure.